08. February 2021
by Christian Fritz | 580 words | ~3 min read
kubernetes minikube cert-manager nginx-ingress oss open source
In this blog post, we want to introduce the minikube-support tools, which we recently released in the first version. The minikube-support tools are intended to automate and simplify common tasks which you need to do every time you set up a new minikube cluster. For this, they combine some cluster internal and external tools to provide a better interaction between minikube and the developers local os. Basically the minikube-support tools are a collection of tools and their configuration which are usually required to work or develop with a minikube cluster but are not pre-installed or properly configured.
The idea for the
minikube-support tools was born in 2019 when we
discovered that nearly every time we wanted to use minikube, we needed to do the same steps after
creating a new minikube cluster. The first idea was to use a bunch of shell scripts which install
the tools and try to configure them properly. Even with those scripts there were some steps which
were not automated. One point was to write the hostnames, and the correct minikube ip into the
/etc/hosts file. Of course this also was a repeating step for every new hostname which we want to
publish using an ingress.
That was the point where the idea came up to combine all into a single command line tool. Basically it should meet the following two requirements:
The main entry point to run everything on the current minikube instance, is the minikube-support
command. For this it installs, configures and provides the following tools and features:
*.minikube.LoadBalancer-Services, served DNS entries and
the minikube tunnel status.minikube:Download the
latest release and place it
somewhere into your $PATH or use our brew tap:
| |
minikube startminikube-support install -lminikube-support install.minikube-support run
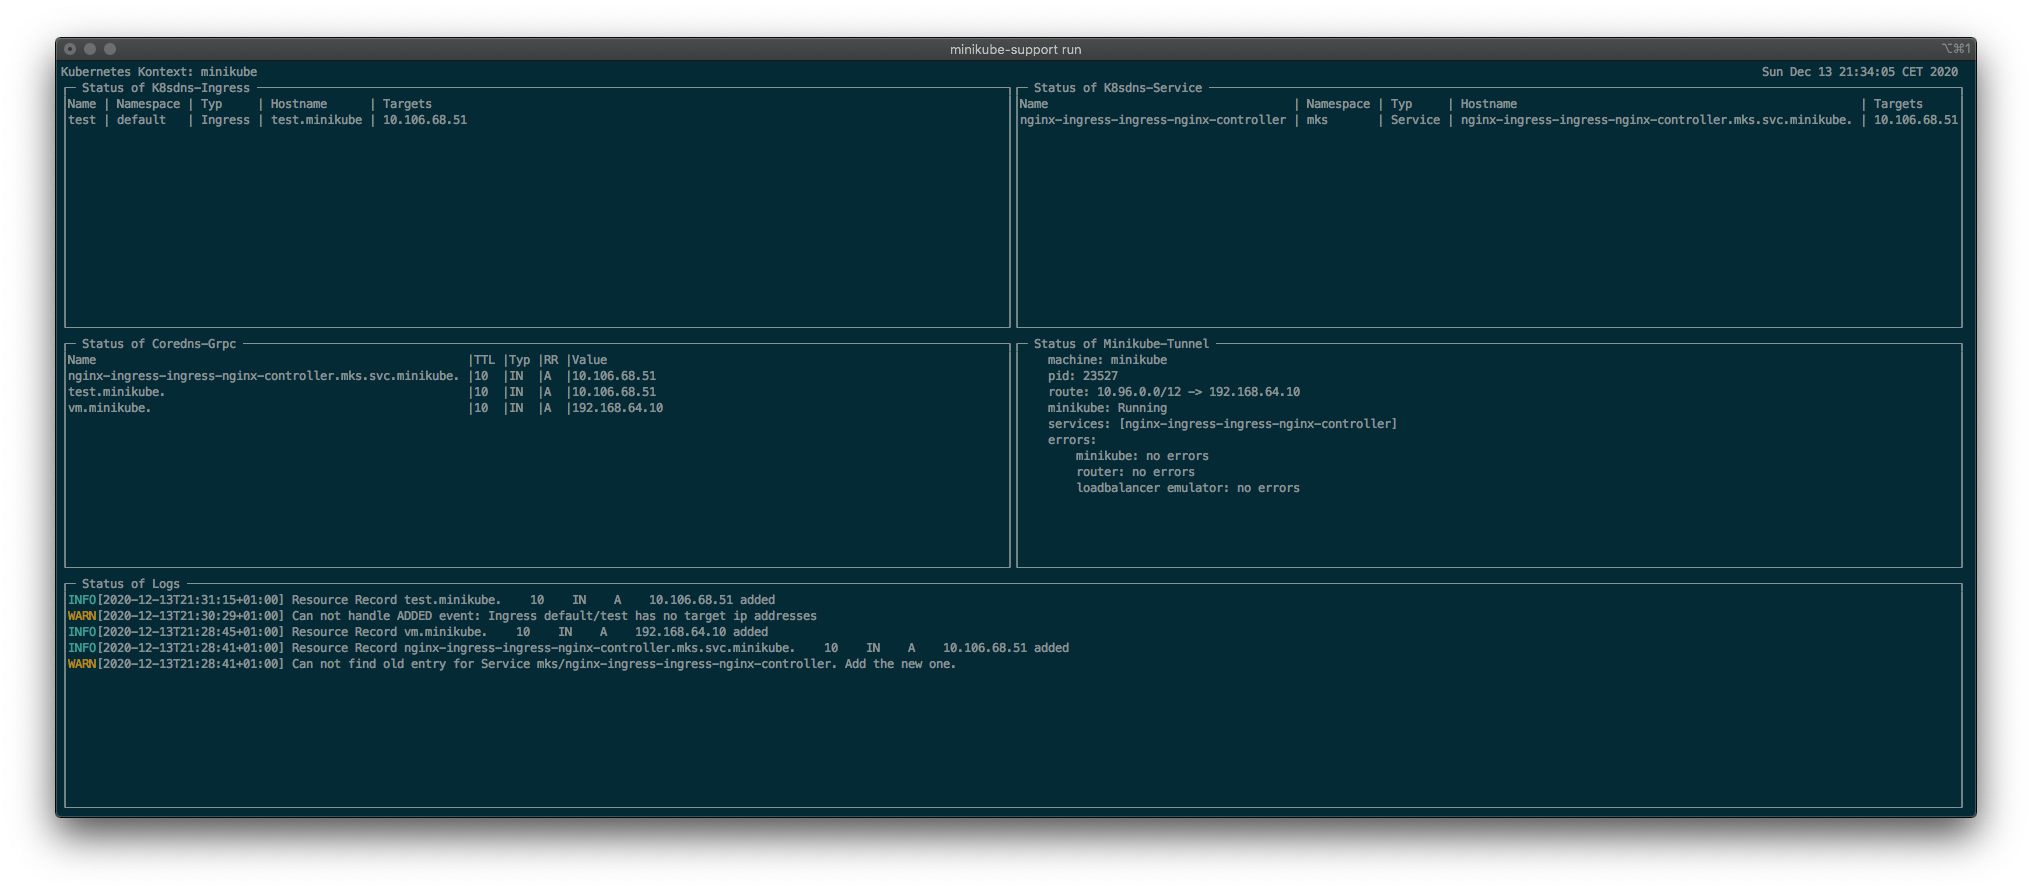
The minikube-support run dashboard
Deploy our application or use our test deployment:
| |
Open your application in your browser when it is visible in the “Status of Coredns-Grpc” box.
The minikube-support tools do not have their own configuration properties, but require to configure the
dns resolver of the local os. For macOS the minikube-support tools will do this automatically. Just
ensure that all your ingresses uses the top level domain .minikube.
For Windows and Linux systems there are no known interfaces or configuration properties to configure
conditional forwarding for DNS requests to .minikube programmatically. In this case you have to
configure your DNS resolving by your own.
This cli tool was developed by Christian Fritz and was gratefully supported by QAware by allowing me to do that during paid working hours.